How to Remove Wallpaper Glue and Fix Uneven Paint
How to remove old wallpaper glue completely, repair the wall underneath, and fix uneven, blotchy paint with proper priming and painting technique.
How to Remove Wallpaper Glue and Fix Uneven Paint
Few home improvement tasks are more satisfying, or more frustrating, than repainting a room that once had wallpaper. The paint itself is easy; the problem is what the wallpaper leaves behind. Old adhesive residue and the uneven surface underneath are the reason so many post-wallpaper paint jobs come out blotchy, streaky, or peeling. Getting a smooth, professional finish is entirely doable, but it depends almost entirely on the prep work you do before the paint ever comes out. This guide walks you through exactly how to remove wallpaper glue and fix uneven paint so your walls end up flat, clean, and ready for a flawless coat.
Why Wallpaper Glue Ruins Paint
Before diving into the how-to, it helps to understand why this step matters so much. Wallpaper adhesive is water-soluble and slightly glossy when it dries. Paint applied over it cannot bond properly, so it may bubble, crack, or peel weeks later. Even worse, the moisture in fresh paint can reactivate old glue, causing it to reappear as sticky, discolored patches that bleed through the finish. Removing every trace of adhesive is not optional, it is the single most important factor in a lasting paint job.
How to Remove Wallpaper Glue
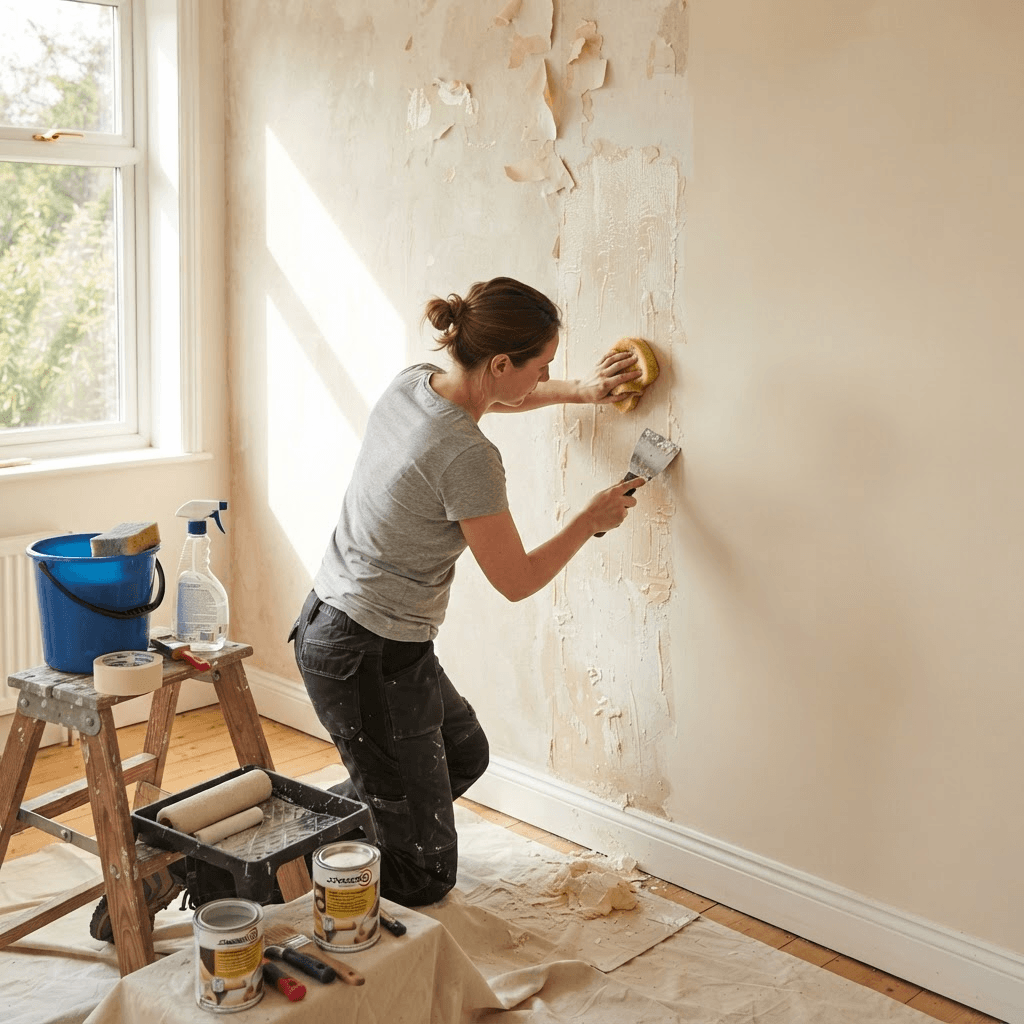
The first job is removing every trace of wallpaper glue, because paint will not adhere properly over old adhesive. Take your time with this step; rushing it is the number one cause of failed results.
- Make sure all wallpaper and backing paper is off the wall. Sometimes a top decorative layer peels away while a paper backing stays stuck, and that backing must come off too.
- Mix warm water with a little dish soap or white vinegar, and apply it generously with a sponge to soften the adhesive. Vinegar's mild acidity helps break down the glue without harsh chemicals.
- Let it soak in for several minutes so the glue turns tacky and gel-like. For stubborn spots, a wallpaper-removal enzyme gel works even better than a homemade solution and clings to the wall longer.
Work in manageable sections rather than trying to wet the whole room at once, since the solution needs to stay wet to keep working. Lay down drop cloths and protect your baseboards and floors, because this process gets messy.
How to Scrape Off Softened Glue
Once the glue has softened, scrape it away with a wide putty knife or plastic scraper, holding the tool at a low angle so you lift the adhesive without gouging the drywall. Metal scrapers work faster but are more likely to nick the surface, so plastic scrapers are safer for beginners.
Work in sections, re-wetting as you go, and keep a bucket of clean water handy to rinse the wall as you finish each area. Change the rinse water often, because dirty water just redeposits glue back onto the wall. The way to know you are done is the touch test: run your hand over the dried wall, and if it feels slick, tacky, or sticky anywhere, there is still glue and you need to keep going. This step is tedious, but skipping it guarantees a failed paint job. When the wall dries completely matte and feels clean and slightly rough, the glue is gone.
Repairing the Wall Surface
With the glue removed, the next challenge is fixing the uneven surface underneath. Wallpaper often hides, or creates, imperfections: torn drywall paper, gouges from scraping, nail holes, and shallow dips. Painting over these flaws only highlights them, especially in raking light from a window.
Start by inspecting the wall closely. If scraping tore the drywall's paper facing, seal those spots with a primer or drywall sealer so they do not soak up paint unevenly. Then fill dents, gouges, and holes with a lightweight spackling or joint compound, pressing it in with a putty knife and smoothing it flush. For larger uneven areas, apply a thin skim coat of joint compound over the whole section to level it out.
Sanding for a Smooth Finish
Once the compound is fully dry, sand the repaired areas smooth with medium-grit sandpaper, then finish with a fine grit for a seamless blend. Sanding is what separates an amateur result from a professional one, because it removes ridges, feathering the edges of your patches so they disappear under paint. Use a sanding pole or block for flat, even pressure, and wipe the wall down with a damp cloth afterward to remove all dust, since paint will not stick to a dusty surface.
Priming: The Step You Cannot Skip
After the wall is clean, repaired, and smooth, prime it before painting. Primer is essential here for three reasons: it seals any faint adhesive residue you might have missed, it creates a uniform surface so the topcoat absorbs evenly, and it hides patched areas that would otherwise show through as dull or shiny spots. A quality stain-blocking or oil-based primer is ideal over former wallpaper walls. Skipping primer is the most common reason a freshly painted formerly-wallpapered wall looks patchy.
How to Fix Uneven Paint
Even with good prep, paint can go on unevenly if applied incorrectly, showing streaks, roller marks, lap lines, or patchy sheen. Here is how to get a smooth, even finish:
- Use quality tools. A good roller with the right nap length for your wall texture, and a quality brush for cutting in, make a dramatic difference.
- Maintain a wet edge. Always roll into the still-wet paint from your previous pass rather than letting sections dry and then overlapping, which causes visible lap marks.
- Apply two thin coats instead of one thick one. Thin, even coats level out better and hide the surface uniformly.
- Load the roller evenly and avoid pressing too hard, which pushes paint into ridges.
- Let each coat dry fully before recoating, and lightly sand between coats if you feel any texture.
If a wall is already painted and looking uneven, lightly sand the glossy or ridged areas, spot-prime any patches, and apply a fresh, even coat using these techniques.
Common Mistakes to Avoid
The biggest mistakes homeowners make are all about impatience: painting before the glue is fully removed, skipping primer, applying paint too thickly, and not letting coats dry. Another common error is working in poor lighting, always use bright, angled light to spot residue and surface flaws before you paint. Finally, do not skip the touch test; it takes seconds and saves you from repainting the entire room.
Final Thoughts
Removing wallpaper glue and fixing uneven paint is not glamorous work, but it is the foundation of a beautiful finish. The paint job you see is only as good as the surface beneath it. By thoroughly softening and scraping away every trace of adhesive, repairing and sanding the wall smooth, priming properly, and applying thin even coats, you transform a problem wall into a flawless one. Put in the prep time, and your freshly painted room will look professionally done and stay that way for years.
Surface prep underpins every finish, and our wall prep and finishing guides carry it through to the final coat.