Water Damage Restoration Process Explained
What actually happens during professional water damage restoration, from inspection and extraction to drying, cleaning, and final repairs, step by step.
Water Damage Restoration Process Explained: Step by Step
When a flood, burst pipe, or major leak hits, "water damage restoration" is the service that brings a home back to normal, but most people have no idea what actually happens between the disaster and the dry, repaired result. Understanding the professional restoration process demystifies it, helps you know what to expect, and makes it easier to judge whether a contractor is doing the job right. The work follows a logical sequence, each step building on the last, and skipping any of them is where problems like hidden mold begin.
Step 1: Inspection and Assessment
The process starts with inspection and assessment. When the crew arrives, they:
- Identify the source of the water, stopping it if it's still active.
- Determine the category of water (clean, gray, or contaminated black water).
- Gauge the extent of the damage.
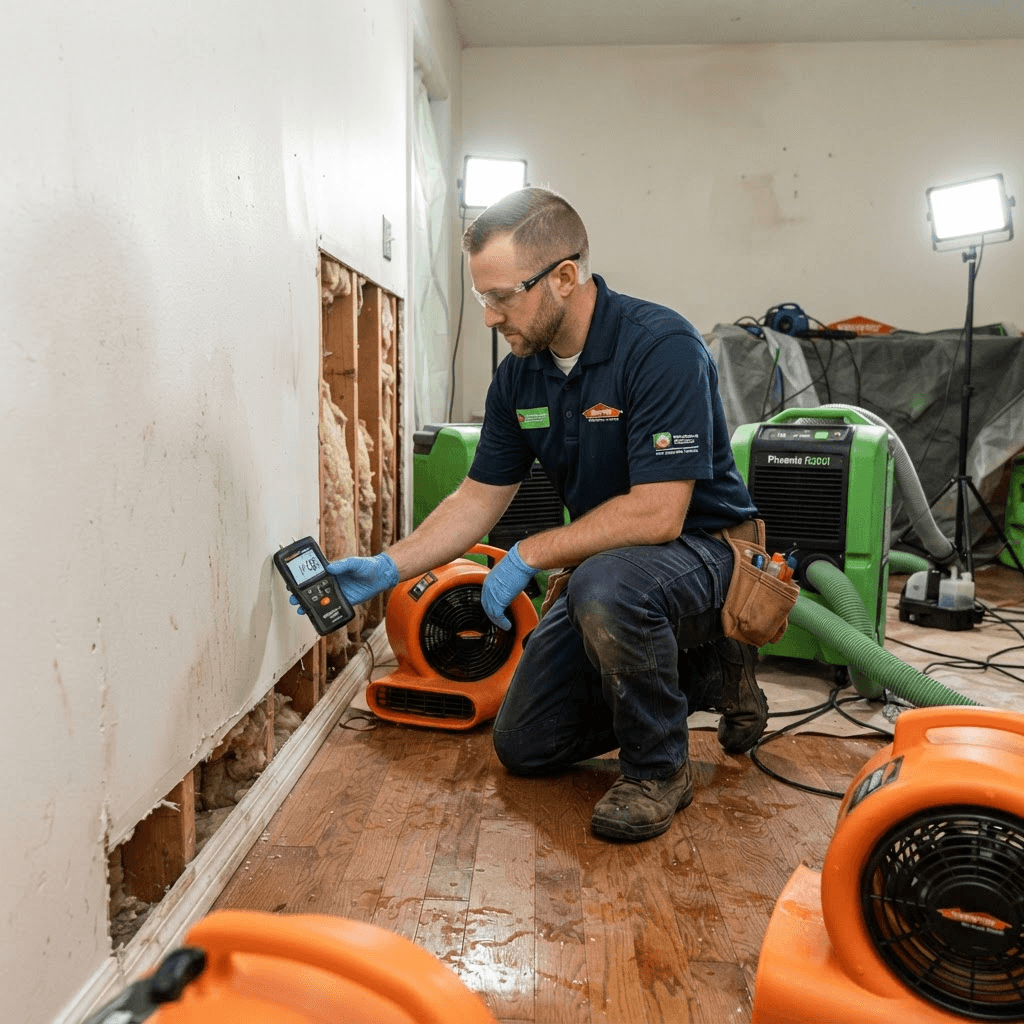
Crucially, they use moisture meters and infrared cameras to map moisture that's invisible to the eye, water that has wicked into drywall, subfloors, insulation, and wall cavities. This assessment defines the scope of the job and the drying plan, and it's why professional detection matters so much: you can't dry what you don't know is wet.
Step 2: Water Extraction
Next comes water extraction, the removal of all standing water, and speed is everything here. Using powerful truck-mounted or portable extractors, submersible pumps, and wet vacuums, the crew removes gallons of water fast, because the longer water sits, the deeper it penetrates and the higher the risk of mold, which can begin within 24 to 48 hours.
Thorough extraction of every accessible pocket of standing water dramatically shortens the drying phase that follows and limits how much material has to be removed or replaced.
Step 3: Drying and Dehumidification
With standing water gone, the focus shifts to drying and dehumidification, the heart of restoration. The crew positions high-velocity air movers to evaporate moisture from surfaces and commercial-grade dehumidifiers to pull that moisture out of the air, controlling humidity so the water doesn't simply migrate elsewhere.
This stage takes several days, during which technicians monitor moisture levels with meters and adjust equipment daily, drying out not just visible surfaces but the framing, subfloor, and wall interiors. Rushing or cutting this phase short is the single most common cause of lingering mold and structural problems.
Step 4: Cleaning, Sanitizing, and Deodorizing
Once everything is verified dry, the crew cleans, sanitizes, and deodorizes:
- Clean and disinfect affected surfaces and salvageable belongings.
- Apply antimicrobial treatments to prevent mold and bacteria growth, especially important with gray or black water.
- Remove unsalvageable materials.
- Address the musty odors water damage leaves behind with deodorizing and air-scrubbing equipment.
This is also where any contaminated materials, soaked carpet padding, ruined drywall, are safely disposed of, leaving the space clean, sanitary, and ready to be rebuilt.
Step 5: Restoration and Repairs
The final step is restoration and repairs, returning the home to its pre-damage condition. Depending on the severity, this can range from minor work like replacing drywall, repainting, and installing new baseboards and carpet, to major reconstruction of rooms.
Some companies handle both mitigation and rebuilding, while others focus on drying and hand off repairs to a general contractor. Throughout, a good restoration company documents everything for your insurance claim.
The Bottom Line
Understanding this sequence, assess, extract, dry, clean, restore, lets you confirm your contractor is being thorough, particularly during the critical drying phase, so your home recovers completely without hidden damage resurfacing months later.
For help finding and vetting the professionals who handle each stage, see our water damage recovery guides.
Frequently Asked Questions
How long does water damage restoration take? Timelines vary with the severity and category of water involved. Drying out a small, clean-water spill may take a few days, while extensive flooding with contaminated water can take a week or more of extraction, drying, and repairs. The faster restoration begins, the shorter the overall process and the less secondary damage like mold you will face.
Does homeowners insurance cover water damage? It depends on the cause. Sudden, accidental damage, like a burst pipe or an overflowing appliance, is usually covered, while gradual leaks, poor maintenance, and flooding from outside water often are not (flooding typically requires separate flood insurance). Document everything with photos and call your insurer quickly to understand your coverage.
Can I clean up water damage myself? Minor, clean-water spills caught immediately can sometimes be handled with fans, a wet vacuum, and thorough drying. But anything involving large volumes, contaminated water, or moisture that has soaked into walls, subfloors, or insulation calls for professionals with commercial drying equipment and moisture meters, since hidden dampness leads to mold and structural rot.
How do I prevent mold after water damage? Speed and thorough drying are key. Remove standing water fast, promote airflow, run dehumidifiers, and discard porous materials that stayed wet too long. Mold can begin growing within a day or two, so professional drying and moisture monitoring are the best defense against a mold problem developing later.